Preparing download

Actionbound Helpdesk

What do you want to know?

The images, audio and videos that you want to add to the content of your Bound must first be uploaded to your media library.

  • Get to know your media library.

How to


You can find the media library in the drop-down menu that opens when you move the mouse over your profile icon .
Here you can create folders, use the search bar or quickly find your media using the filter function (images/audios/videos).

Upload media into your media librabry

There are various ways to upload media:

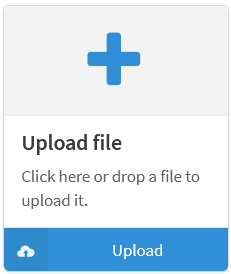
  • Drag and drop the file over the Upload file area
  • Clicking on the Plus or Upload opens the Explorer (Windows) or the Finder (Apple) from which the media can be selected by double-clicking. After specifying the file name, tags and license type, the file is uploaded to the media library by clicking on Upload.

File name

The File name field is filled in by default and can be changed before uploading.

Tags

Assign tags (keywords) to make your media easier to find. You can enter the tags later in the search bar of your media library and your images, audios or videos will be displayed without you having to enter the entire file name. Tags can be used multiple times, similar to categories.

Licence type

When uploading, select the license under which the image is used and fill in the complete license information and the URL accordingly.
Information on copyright and CC licenses can be found here.
If you use copyrighted third-party material, you must have cleared the rights with the author. The author of the bound is liable for any infringements. The uploaded media can be used as often as you like in any of your Bounds.

Edit or delete media

  • Clicking on Edit opens the file and the file name, tags and license details can be edited.

  • Click Delete and then Delete permanently to remove the file from your own media library.

Media folder

Organize your media library clearly and divide your media into folders.
You can move the folders within your media library using drag & drop.

Create folder

To do this, click on New folder next to My media.
Now enter a name for your folder and select the color in which the folder will be displayed in your media library.

The folder is created and appears in your media library by clicking on Create folder.

Tip

Structure your media library and create sub-folders in your media folder.

Edit or delete folder

Click on Edit to open the settings of your folder. Now you can change the name or color of your media folder.

To delete this media folder, click on the red button Delete at the bottom left. If your folder contains media or sub-folders, check the box and click on I´m sure so that the contents of your folder are also deleted.

Example of use

Would you like to make your media available to other accounts within your license? This is very easy with our Shared Folder feature.

If you have any questions about the Shared Folder tool, simply contact our sales team at sales@actionbound.com or call +49-30-12083317.

Lisa Podiwin

Lisa Podiwin
Support & Customer Success

Updated on Nov 9, 2023

Was this article helpful?