Preparing download

Actionbound Helpdesk

What do you want to know?

Switches make it possible to create different game courses in a Bound, to include secret information and special tasks, to create real Escape Games and much more.

  • You can think of switches as a switch on an element.
  • Only if the specified conditions apply, the switch is flipped and the element is displayed in the course of the game. Otherwise it remains unseen.

How to

  • A switch can be used with any element. .

  • First, activate the switches in the settings.

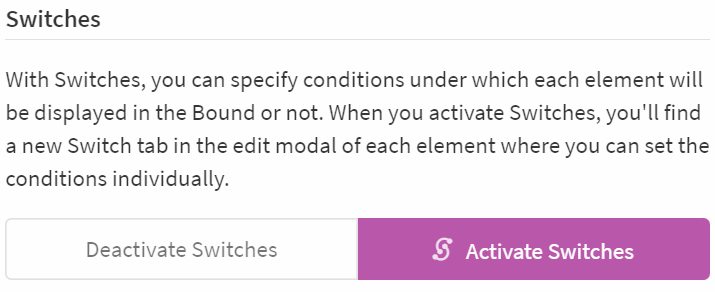
  • Go to the Settings of your Bound.

  • Click on Enable Switches on the right-hand side under "Switches".

  • Back in the content, a new menu tab Switch. now appears for each element.

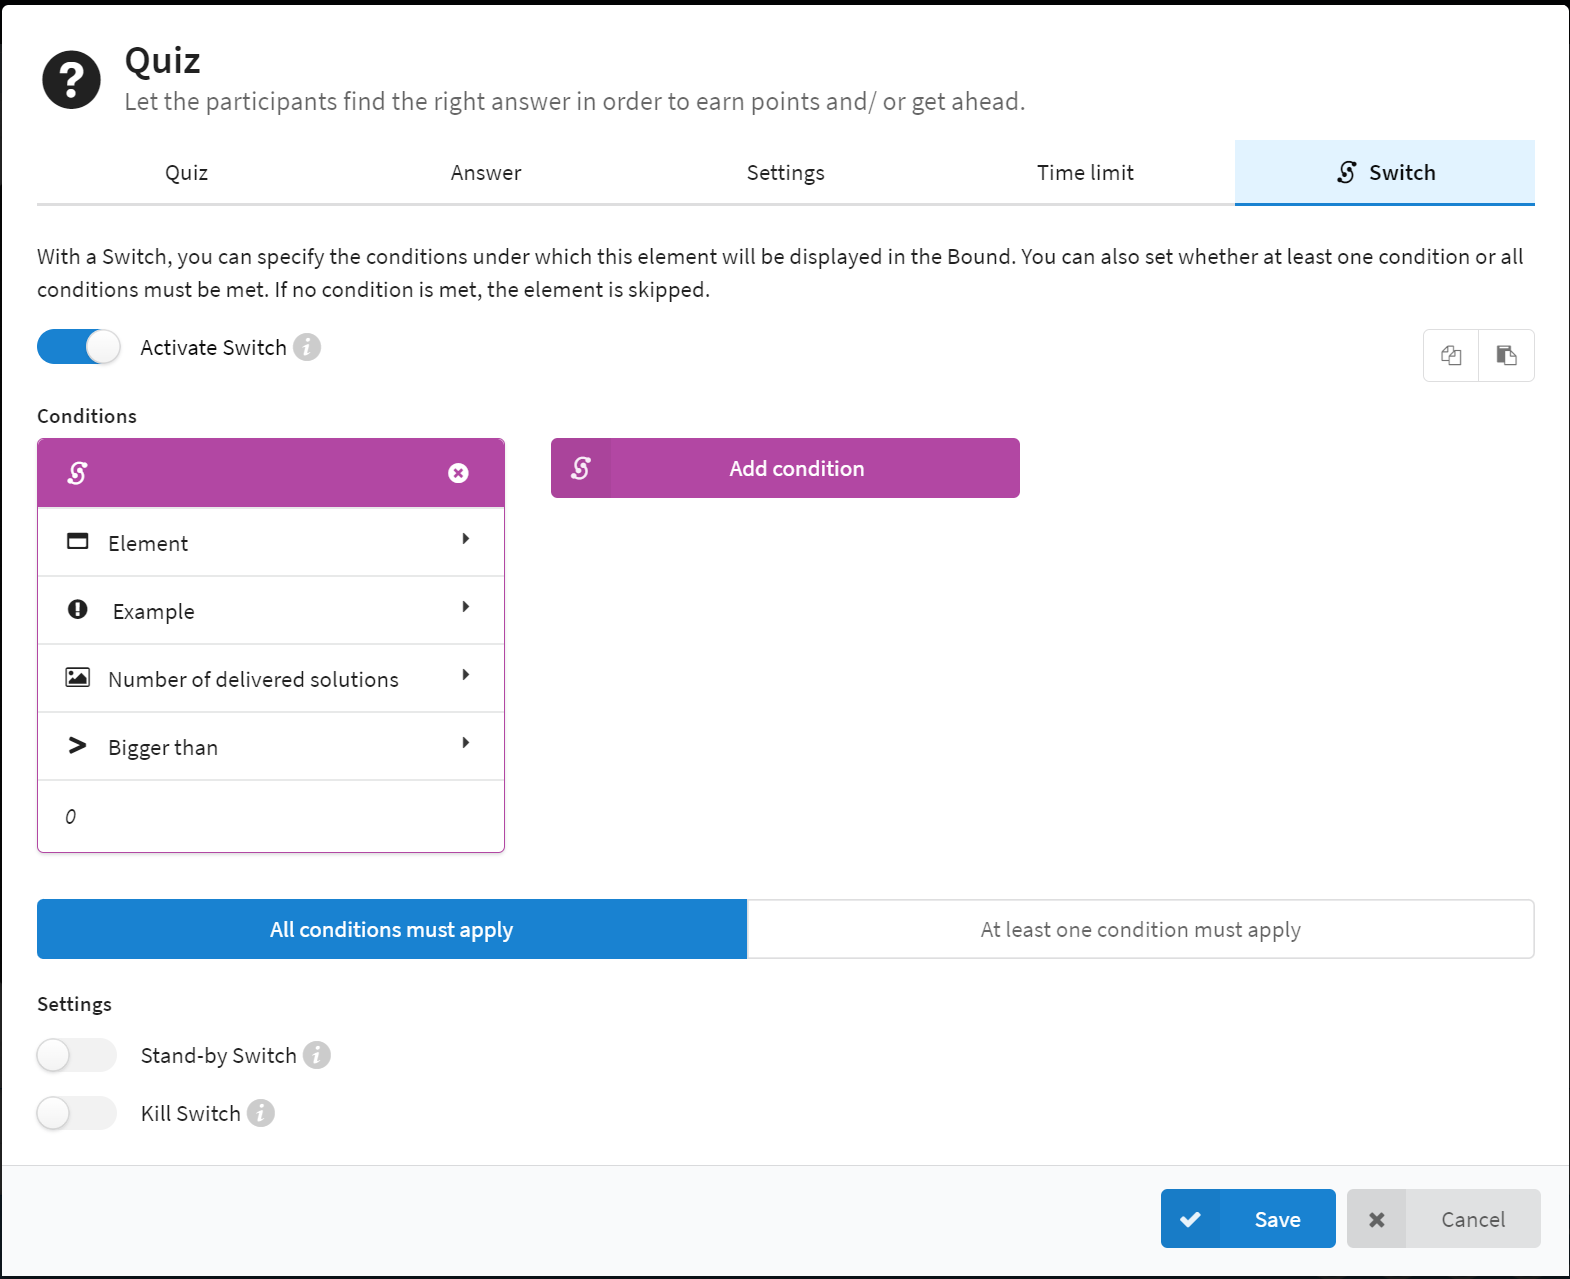
  • Click on the Switch enable slider and then on Add condition.

  • Define the conditions under which the element or section is to be displayed in the Bound sequence. Conditions can concern e.g. actions in elements, the progress and decisions of your Bound players, the time played, etc.

  • You can create as many conditions as you like for each switch and determine whether all or at least one condition should apply.

Conditions depending on other elements

You have the option of displaying elements in the Bound depending on other, already existing elements (called reference element in the following).

In this way, you can set the element to be displayed only if, for example, a question in the reference element has been answered correctly, the reference element has been displayed or how many points have been achieved, etc.

First open or create the desired element.
Then click on the Switch menu tab.
Activate the switch and click on Add Condition.
Select Element and choose the desired reference element from the dropdown.

Achieved (for all reference elements)

The element is played in the Bound if the reference element has already been displayed (Yes) or has not been displayed (No).

Application example: You only want to display the element if another element, e.g. in a flexible section, has been reached.

Time required (for all _reference elements)

The element is displayed in the Bound if more (longer than) or less (shorter than) X seconds, minutes or hours were needed when playing the reference element.

Example of use: For example, you can set the system to display additional information if the players in the reference element have played for less than two minutes.

Solved (for quiz questions as a reference element)

The item is displayed in the Bound if the quiz question in the reference item was solved correctly (Yes) or not solved (No).

Note

If the reference item was not displayed (e.g. due to its own switch), it is automatically considered as not solved.

Answer (For quiz questions and survey as reference element)

The element is displayed in the Bound if the answer given in the reference element contains the words, letters or numbers you define here.

Exactly, requires the exact content defined here, no more, no less. Contains requires the content defined here, but additional words, letters or numbers do not interfere. Does not contain, none of the content defined here may appear.

Points achieved (for quiz questions as reference element)

The item is displayed in the Bound if the score achieved in the reference item is Less than, Greater than or Exact X points.

The choices here are NOT less than or greater than. This means that if you want the item to be displayed for all players with 500 points or less, you must enter Less than as 501.

Hint
If you want to set a range of points, you define two conditions, one Less than X and the other Larger than X and select All conditions must apply.

Number of solutions given (for tasks as a reference element)

The element is displayed in the Bound if the number of texts, images, videos or audio files entered in the reference element is Less than, Greater than or Exactly X.

The selection option here is NOT less than or greater than. This means that if you want the players to upload at least one medium, you must enter Larger than 0 here.

Found (at Find location and scan code reference elements)

The item is displayed in the Bound if the location was reached or QR code was scanned that should be found in the reference item (Yes) or was not found (No).

Stage completed (for section reference elements)

The item is displayed in the Bound when the reference section has been played completely.

Conditions depending on the players

You have the option of displaying elements depending on where the playing team is at the moment, how many points they have collected so far or how many players are in the team.

In this way, you can set the element to be displayed only if the players move too far away from a certain place, to remind them where they should go - but only if they have only scored a few points.

First open or create the desired item.
Then click on the Switch menu tab.
Activate the switch and click on Add Condition.
Select Bound player and the desired function.

Points achieved so far

The item is displayed in the Bound if the total number of points already achieved in the Bound is Larger than, Less than or Exactly X points.

The choices here are NOT less than or greater than. This means that if you want the item to be displayed for all players with 500 points or less, you must enter Less than 501.

Hint
If you want to set a range of points, define two conditions, one Less than X and the other Larger than X and select All conditions must apply.

Number of players

The element is displayed in the Bound if more (Larger than) X, less (Less than) X or a certain (Exact) number of players have entered their names at the beginning of a Group Bound.

The choices here are NOT less than or greater than. This means that if you want to display an element for a group of 3 or more players, for example, you enter greater than 2 here.

Distance to coordinate

The item is displayed in the Bound when the players are around a certain coordinate. The radius can be set to More than or Less than X metres/kilometres/feet/miles. As with Find a Place elements, you select the coordinate via the map.

Conditions depending on times

You have the option of displaying elements depending on the elapsed playing time or specific dates, times or days of the week.

For example, you can set the element to be displayed only after 12 April 2023 and only on Thursdays between 12:00 and 15:00.

First open or create the desired element.
Then click on the Switch menu tab.
Activate the switch and click on Add condition.
Select Time and the desired function.

Elapsed playing time

The item is displayed in the Bound if more (Longer than) or less (Shorter than) of the playing time X you have set has elapsed.

Hint
If you want to define a time span, create two conditions, one Shorter than, one Longer than and select All conditions must apply.

Time

The element is displayed in the Bound if it is before or after a certain time.

Hint
If you want to define a time period, create two conditions, one after X clock, one before X clock and select All conditions must apply.

Date

The item is displayed in the Bound when Before, After or On a specific date is played.

Hint
If you want to define a time period, then create two conditions, one After X clock, one Before X clock and select All conditions must apply.

Weekday

The item is displayed in the Bound if it is played on a certain day of the week (is) or not on a certain day of the week (is not).

For example, if you want to display the item only on weekends, create two conditions, one for is Saturday and one for is Sunday and select at least one condition must apply.

Conditions depending on special settings

An element can also be displayed randomly or depending on the operating system of the game device.

For example, you can set the teams to randomly receive different tasks or you can think of a task that can only be solved with the iPhone.

First open or create the desired item.
Then click on the menu tab Switch.
Activate the switch and click on Add Condition.
Select Special and the desired function.

Probability

You define the probability in percent with which the element is played in the Bound.

Hint
With several elements in a row, which are assigned probabilities but are only displayed if the others have not been displayed (switch with reference element that has not been reached), you can thus randomly assign different tasks to different teams.

Device

The item is displayed in the Bound when playing on an Android or iOS device.

Stand-by-Switch

With a stand-by switch, you ensure that an element (or section) only appears when its conditions have been met.

This means that the game checks after each element whether the specified conditions have been met. If this is the case, the stand-by element is displayed once - regardless of its position in the course of the game.
It is important here that the game only starts the check when the stand-by element has been reached in the overall course of the game. Therefore, it is advisable to place the element with the stand-by switch at the beginning of the Bound.
In addition, the conditions for switches are checked when moving from one element to the next. An element with a stand-by switch thus only appears when the conditions apply and the current element has ended.

Kill-Switch

With the option Switch ends Bound you ensure that the Bound is automatically ended after this element (or section).

That is, if the conditions of the switch apply, the element (or section) is displayed. After this element (or the last element of the section), the Bound is ended - regardless of how many elements were still planned in the overall sequence.
For example, the switch can be set so that the Bound ends as soon as the player(s) has/have reached exactly 500 points. This element would then be displayed and then forward to the end of the Bound.

Application options

There are countless possible applications for the use of switches. You can find some examples in the explanations above.
The Actionbound Academy regularly gives a free Switches crash course, in which many practical examples are demonstrated and you can also contribute your own ideas. You can find all the current events here.

Award points for a mission

The mission elements are not awarded points. If you still want to reward your players for their creativity, you could do it like this:
Create a Quiz element and state as a question, for example, "Great! Thank you for your creativity. Here you can collect your points".
Select the Multiple Choice mode and enter the following answer options: "Collect points" (correct) and "No thanks".
Now activate the Switch and create the following condition:
Condition depending on an Element.
Then select the task element to be scored.
Select Number of specified solutions be Larger than 0.

As a result, all players who have given one (or more) solutions to the task in the Bound, e.g. uploaded a photo, will be shown the new quiz element, with which they can easily collect points. Those players who have skipped the task do not have this option, as the quiz element is not displayed to them because of the switch.

Team selection

Do you want your Bound to be a real teamwork experience? Then create two game strands in one Bound. This is how it works:
Start your Bound as normal with your game introduction.
Then create a poll element with two choices.
Our example is the Escape Bound "A heart or just a black hole", which you can find here to play.

In this case, the players can choose whether they want to play as Sun or Moon. You could also choose characters here, simple distinctions like A and B or 1 and 2 or levels like beginner and advanced.

Now create a section "Sun".
For the section you activate the Switch and create the following condition:
Condition depending on an element.
Then select the Survey element with the choice between Sun/Moon or similar.
Select Answer, Contains and then your first choice e.g. Sun.

Then create as many elements as you want to be played by Person/Team Sun.

Now create another section "Moon".
Activate the Switch here too and create the condition as above:
Condition depending on an Element.
Then select the Survey element with the choice between Sun/Moon or similar.
Select Answer, Contains and then your second choice e.g. Moon.

If you want the Moon and Sun to have the same tasks, you can simply copy the Sun section and rename it in the Section Element.
Alternatively, create other elements here. In the Bound example, the tasks and information of the two sections complement each other so that the teams really have to work together.
E.g. Sun receives information and Moon receives the corresponding quiz question. Only together can they solve the question.

At the end of the second section of the game (here: section Moon) you create another section element* and below it all the elements that are still needed to finish the game. This section (and all its elements) will be seen by all players, regardless of which section they had previously chosen.

Additional information

If your players have done particularly well, you can reward them with additional quiz questions or information.
For a bonus question, create a Quiz or Information element, congratulate the players on their success so far and then ask your question, if applicable, with which they can score additional points.
Now activate the Switch and create the following condition:
Condition depending on the Bound players.
Select Points achieved so far.
Determine from how many points the bonus question/information should appear. Example: In the entire Bound, 1,000 points could be collected up to this element. All players with more than 800 points will now receive the additional quiz question/information.
Then select Bigger than and 800.

Caution!

The switches are a great feature for varied bounds, but they have some pitfalls and require extensive testing.

For a better understanding of the function, you can think of switches like

  • a switch that flips under certain conditions.
  • Railway tracks with switches and different routes. The switch corresponds to the lever on the turnout that paves one way or the other depending on the setting.
  • An if-then function in Excel. If your specified condition applies, the element is displayed. Otherwise it will not.

Bear in mind that the use of many switches results in a whole chain of conditions. In order not to lose the overview and so that everything works the way you imagined it, it can be helpful to create a mind map. Either classically with pen and paper or - somewhat more flexible in its use - a digital one via websites such as Miro, Figma, etc.

Anna Brauckmann

Anna Brauckmann
Actionbound Academy

Aktualisiert am Jan 16, 2024